Setting Up For Using ContentLib
Before you can get started using ContentLib, there’s a few things you’ll have to set up. Don’t worry, it’s still a lot faster than the full modding environment setup process.
Install ContentLib in your Game Client
If you haven’t already done so, use Satisfactory Mod Manager to install ContentLib in your game client.
Get a Good Text Editor
Using Windows Notepad, or Notepad++, will actively make editing your scripts more difficult. Don’t use those editors for working on your ContentLib scripts! They are nice editors, but not for this purpose.
Get a text editor that supports JSON Schemas, or you can use the VSCode web editor if you don’t want to download anything.
| Works? | Editor Name | Notes |
|---|---|---|
✔️ |
Visual Studio Code (VSCode) |
Flexible modern text editor. Video demo: 📹 YouTube video |
✔️ |
Web version of Visual Studio Code, no downloads needed. |
|
✔️ |
JetBrains IDEs (e.g. Rider) |
All JetBrains IDEs support JSON Schemas. See the JetBrains documentation. |
❌ |
Windows Notepad |
No JSON Schema support. |
❌ |
Notepad++ |
A great text editor, but no JSON Schema support. |
❌ |
Word/WordPad |
Do not use a word processor for editing code. |
If you use a good editor with JSON schema support, you will reap the following benefits:
-
The editor will automatically check JSON syntax for you (~50% of errors people make with ContentLib are this)
-
You can hover over any part of the JSON and the editor will explain its purpose for you
-
The editor will provide example values for you as you type
-
You’ll get nice syntax highlighting
|
Don’t use Notepad or Notepad++ to edit your scripts! Just don’t! You are consciously, willingly, choosing to make the process take longer if you stick with those editors for no clear benefit. If you ask for help, my first question will be "does your editor say it matches the JSON Schema?" I (Robb) will not check JSON syntax for you, the schema does that automatically. People (me included) make mistakes, the schema checker doesn’t. |
Visual Studio Code Setup
The documentation will assume you are using Visual Studio Code (VSCode), as it’s the most accessible editor mentioned in the above options.
As a security measure, VSCode requires you to "trust" web URLs that contain JSON schemas before the editor will load them. These directions will walk you through adjusting its settings so ContentLib’s JSON schemas are trusted. Once the setting is changed it will work for every future file you work with.
-
Create a new text file in VSCode via
File>New Text File. It will be a temporary file, so it doesn’t matter where the file is located. -
Copy and paste the below text into the file:
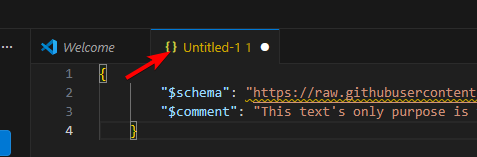
{ "$schema": "https://raw.githubusercontent.com/budak7273/ContentLib_Documentation/main/JsonSchemas/CL_Schematic.json", "$comment": "This text's only purpose is to point to a schema URL, causing VSCode to generate the error message that lets you trust it." } -
Notice that VSCode has detected the file as JSON and updated the colors and icon accordingly:
-
Notice the yellow squiggle underline on the
$schemaline of the file. Hover over it and you’ll see the aforementioned security warning message. At the bottom of the tooltip, click the blueQuick Fix…text
-
Click
Configure Trusted Domains…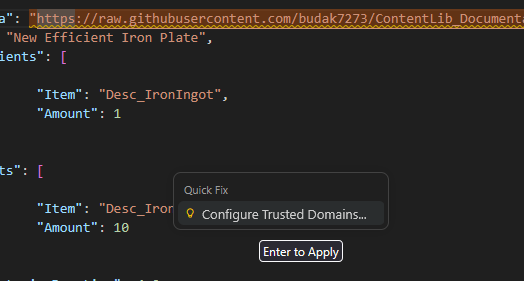
-
In the Command Pallate picker that appears, select
Configure Setting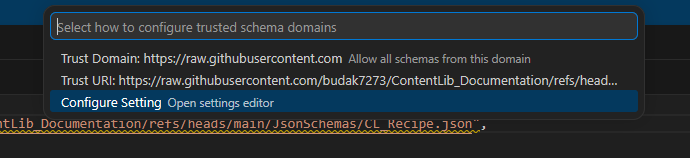
-
In the Settings window, click
Add Item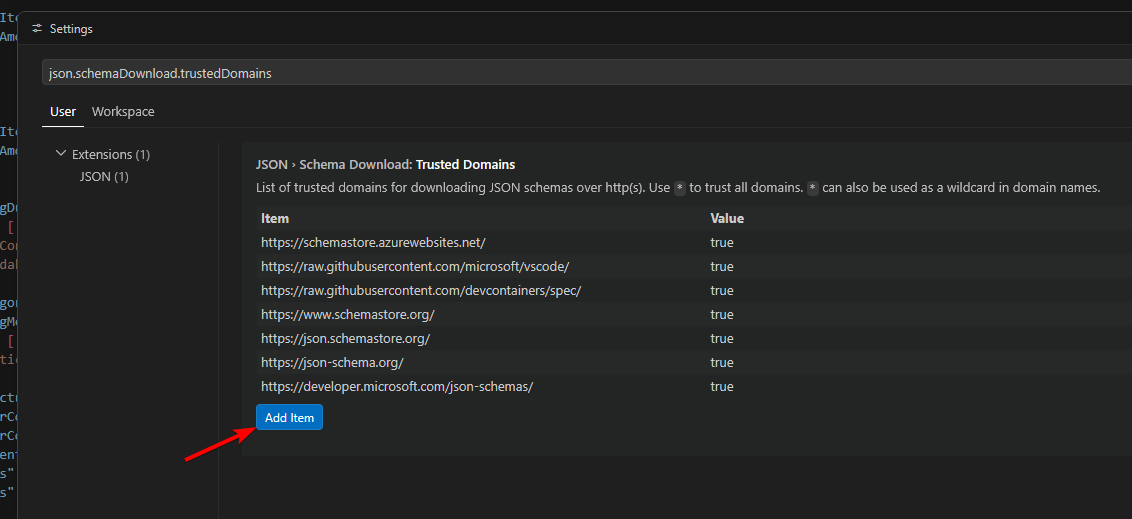
-
For the new item, enter the "Key" of
https://raw.githubusercontent.com/budak7273/ContentLib_Documentation/and keep the default "Value" oftrue. Click the blueOKbutton to confirm. This value means VSCode will trust any schema URLs that start with that path, which includes just the schemas published for ContentLib usage.
-
Close the Settings window via the
X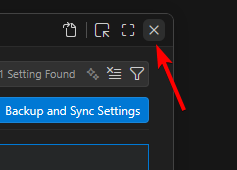
-
Return to the file. The yellow squiggle underline should now be gone!

Alternate Approach: Configs Folder
This tutorial walks you through setting up a mini mod to hold your scripts. This keeps your files organized and makes it simple to distribute your tweaks to other users later.
If you don’t care about that, it’s possible to put your scripts inside of your configuration folders instead.
The tutorials are written assuming that your files are in a mod folder, though.
Download the Example Mod Skeleton
Download the empty mod skeleton zip from here. It contains a basic set of folders and files to make your modding experience easier.
Extract this zip to a temporary location; we will be moving the folder in another section.
Before you release a mod from this template,
you must switch over some files to use your mod reference
instead of the current value of ExampleContentLibMod
You can read more about mod references and what naming format they must follow in the main modding documentation.
It’s okay to leave it as ExampleContentLibMod for now, but it also doesn’t hurt to change it right now if you already have a name in mind for your mod.
Once you have decided on a mod reference, you will have to:
-
Rename the folder (from
ExampleContentLibModtoYourModReferenceHere) -
Rename the .uplugin file inside the folder (from
ExampleContentLibMod.uplugintoYourModReferenceHere.uplugin) -
(Optional) Replace
/Resources/Icon128.pngwith image of your choice for the mod icon
Inside the .uplugin file:
-
Edit the FriendlyName, Description, and CreatedBy fields to your preferences
-
Replace the "ContentLibVersionReplaceMe" with the latest version number of ContentLib found here, so that it follows the format
^The.Number.Here. Once you’re done, that section will look similar to this:
{
  "Name": "ContentLib",
  "Enabled": true,
  "SemVersion": "^1.10.0"
},-
Replace the "GameVersion" with the latest game version number so it follows the format
>=GameCLVersionReplaceMe. You can find the latest game version number in the "Game Versions" column of the SML mod page’s Versions tab. Once you’re done, it will look similar to this:
"GameVersion": ">=491125",Setting Up the Mod Folder
You have a few options for how to get started depending on what you currently have set up:
-
Go with Option 1 if you haven’t developed mods before, or want to try this out quickly
-
Go with Option 2 if you already have the CSS Unreal Editor set up, or you want to develop full mods in the future (ex. ones with custom item models, buildings, user interfaces, etc.)
-
Go with Option 3 if you already have an existing mod and you’d like to add ContentLib content to it
Option 1 - No Unreal Editor
Put the skeleton folder in the Mods folder of your Satisfactory game install.
To find your game install, follow the directions in the Satisfactory Modding FAQ: Where are my game files located?
For example, if your game was installed in the folder
D:\Programs\EpicGamesGames\SatisfactoryExperimental\
then the folder path to inside of the folder you moved in should be
D:\Programs\EpicGamesGames\SatisfactoryExperimental\FactoryGame\Mods\YourModReferenceHere
Continuing the example, this means that the uplugin file will be located at
D:\Programs\EpicGamesGames\SatisfactoryExperimental\FactoryGame\Mods\YourModReferenceHere\YourModReferenceHere.uplugin
You will be developing your script files in this mod folder.
Beware that other modding tools could accidentally delete it, so keep backups!
Proceed to the Next Steps section.
Option 2 - With Unreal Editor
If you have a copy of the editor,
you probably already know what you’re doing,
and you can put the skeleton mod in the project’s Mods/ folder,
after which you can Alpakit like any other mod.
If you don’t have a copy of the editor, you should to follow the normal modding setup docs to get one, and follow the modding starter project set up. This will take some time, but if you ever want to add more advanced functionality to your mod, you will have to do this anyways.
When the docs ask you to create a mod, you can skip that step, and instead bring in the skeleton mod folder.
Your will develop your script files in the modding project’s mod folder. In order to try your changes out in the game, and distribute your mod to others, use Alpakit as described in the main modding docs.
In order to package your mod, you will also have to bring in the ContentLib source code. Follow the steps here to do this. Alternatively, you can temporarily remove the ContentLib dependency from your mod’s uplugin file (since there are no hard direct code dependencies between your mod’s json files and ContentLib) although you must remember to fix this before uploading your mod to the mod portal, else it will not work when people try to download it.
Proceed to the Next Steps section.
Option 3 - Adding ContentLib Scripts to an Existing Mod
If you already have a mod set up, and you want to add ContentLib JSON scripts to it, you will have to modify your mod’s plugin setup slightly to ensure they are packaged with the mod.
Put Scripts in the Plugin Folders
Scripts should be in the following plugin folder locations. See the Folders page for more info.
/ModReferenceGoesHere/ContentLib/Items/
/ModReferenceGoesHere/ContentLib/Icons/
/ModReferenceGoesHere/ContentLib/Recipes/
/ModReferenceGoesHere/ContentLib/RecipePatches/
/ModReferenceGoesHere/ContentLib/ItemPatches/
/ModReferenceGoesHere/ContentLib/Schematics/
/ModReferenceGoesHere/ContentLib/SchematicPatches/
/ModReferenceGoesHere/ContentLib/VisualKits/
/ModReferenceGoesHere/ContentLib/CDOs/
Dependency Configuration
Make sure that you list ContentLib as a required dependency of your own mod,
and follow the directions
here
to be sure that any json files you include in your mod files get packed into your final mod.
Example PluginSettings.ini after following those directions:
[StageSettings]
+AdditionalNonUSFDirectories=Resources
+AdditionalNonUSFDirectories=ContentLib
Proceed to the Next Steps section.
Next Steps
Now that you’ve got your editor and mod set up, it’s time to get started making some content.
A great place to start is the Create an Item tutorial.