Manual Installation Process for SML and Mods
|
We highly suggest you follow the directions here to use mods and SML instead, since it vastly simplifies the process of installing, testing, and using mods. |
|
We offer no support for manual installs on the Discord due to the high potential for error in the process. |
Installing Mods
If you don’t want to use the Mod Manager for some reason, or you are a mod maker and want to test your mod without it, continue reading below for instructions.
Installing SML
|
If you already have your development environment set up, you can simply use Alpakit to build SML for you and put it in the right folder. Note that this could cause problems if your copy of the Starter Project is not up to date with the latest SML changes, in which case you should either update your Starter Project or follow the steps below instead. |
First, you need to download a version of SML compatible with your game from SMR.
If you want to download the latest development version of SML, you can build them yourself with the Unreal editor, or get them from the CI artifacts here. Only do this if you know what you are doing, and be sure to test with a released version of SML before distributing your mod.
To install SML, unzip the file into Mods folder at <game root>/FactoryGame/Mods.
If the folder doesn’t exist yet, create it.
|
Note that this folder is within the FactoryGame folder and not your game root folder, where it was in previous SML versions. |
When you’re done, you should have this folder structure:
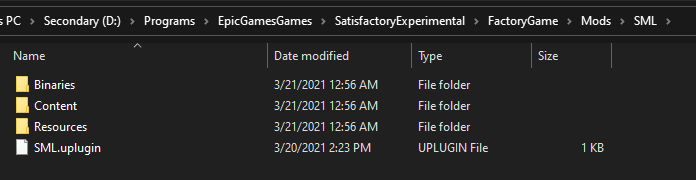
Make sure the name of the folder containing SML’s mod files is named exactly SML.
Folder names and levels of folder nesting matter, so make sure you have the correct structure.
Installing Your Mod of Choice
On SMR, navigate to your desired mod’s page, click on
versions in the upper right left corner.
Each row is a version of the mod with more recent uploads appearing higher on the list.
Once you’ve identified the correct version,
click View to view its extended details.
Verify that the CL# of Satisfactory that you have installed satisfies the Game Version range listed for the version, and ensure that you’ve got the correct SML version installed (listed in the Dependencies section of the version page).
Then use the Download… dropdown to obtain the file for target you’re installing to.
|
Always check to make sure that the |
Next, preview the contents of the smod/zip file and open the .uplugin file in a text editor.
Look for the GameFeature field, as its value determines where the mod files need to be placed:
-
If
true: Files go in<game root>/FactoryGame/Mods/GameFeatures/ -
If
false(or absent): Files go in<game root>/FactoryGame/Mods/
Now unzip the downloaded .smod/.zip file into the path above.
When you’re done, you should have roughly the following folder structure for a GameFeature: false mod:
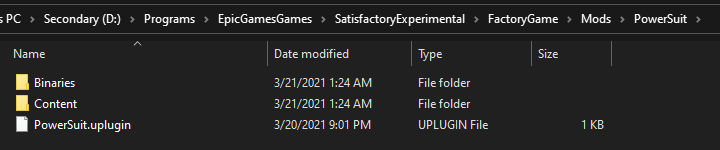
Make sure the name of the folder containing the mod’s files is named EXACTLY the same thing as the mod’s uplugin file. Folder names and levels of folder nesting matter, so make sure you have the correct structure and names.
|
You must manually identify and install all mod dependencies yourself! This is yet another reason to use the Mod Manager instead, as it will handle that for you. This information is visible in the uplugin file and the Version page on ficsit.app. |
Installing Mods on Linux
|
No Linux manual install directions have been written yet for SML 3, and they have changed vastly from SML 2, making the old directions entirely irrelevant. Please contact us with revised Linux directions to put here, or send a PR via 'Edit This Page' in the top right. |
You should use Satisfactory Mod Manager to install mods on Linux, where it works out of the box. Information for downloading SMM can be found on the respective page.
Installing Mods on Dedicated Servers
Follow the directions on the Installing Mods on Dedicated Servers page to set up and configure modded dedicated servers.